Build your own garden gate

The most important points in brief
- Careful planning is crucial for building your own garden gate – material selection, dimensions, and necessary tools should be considered in advance to realistically estimate the effort and costs.
- While a metal gate requires more craftsmanship, it offers significantly greater stability, durability, and weather resistance.
- ELEO provides expert instructions and offers the Belluno garden gate, a ready-made metal gate that saves time and effort.
Build your own garden gate: simple instructions
Are you looking for garden gate ideas and want to build your own garden gate? We'll give you tips on preparation, material selection, and explain how to build a simple garden gate yourself, whether from wood or metal.
Plan carefully before you start building your garden gate
Before you begin building your garden gate, there are some important questions to answer. Which material is suitable, and what are the costs? What are the exact dimensions? Careful planning is always worthwhile.
Wood or metal? Choosing the Material
Metal or wood? When deciding to build your own garden gate, the first question is which material to choose. Consider the following points:
- Does the material match the rest of the fence system or the adjacent wall?
- Does the material suit the surroundings or the design of your garden?
- How difficult is the DIY project?
- Can a garden gate made of your chosen material be attached to the fence or a wall?
Calculate Costs
Is a DIY garden gate always cheaper than a store-bought one? This isn't necessarily true. Therefore, carefully consider the costs you will incur when building your own gate. The following factors cause costs:
- Materials
- Tools
- Labor Hours
It's especially important to calculate realistically when it comes to labor hours. If you have experience with DIY projects, the hours may be lower than if you have no experience or simply lack the knack for it. Tools can also quickly become expensive, especially if you don't already have a saw, milling machine, welding equipment, etc., in your toolbox and have to buy everything new.
Make a sketch
How wide and high should your garden gate be, and what design should it have? Before starting construction, take all the necessary measurements, jot down all your ideas for the garden gate, and make a sketch.
Disposing of your old garden gate
Do you already own a garden gate that you now want to replace with a new model? Then you'll need to dispose of the old one first – that goes without saying. Pay attention to the following points:
- When disposing of an old wooden gate, it matters whether the wood is treated or untreated.
- Depending on their size, wooden garden gates are not considered bulky waste and must be disposed of through recycling companies.
- You must not dispose of metal in your household waste.
- For more information, please contact your local recycling center or waste disposal site.

Build Your Own Wooden Garden Gate
The classic among DIY garden gates: the wooden gate. And for good reason, because a wooden garden gate is much easier to build yourself than a metal one. We'll explain the best way to proceed.
Choose the Type of Wood
Suitable for building a wooden gate:
- Slats (preferably pressure-treated)
- Boards (for a solid board door)
- Pallets
For the stability of your wooden garden gate, it's important that it has bracing. This means that one or more slats are attached across the top of the goal to reinforce it. The most well-known model is the Z-brace (see image).
Materials and Tools
To build your own wooden garden gate, you will need the following tools:
- Tape measure
- Miter saw or handsaw
- Drill bit
- Screwdriver or cordless drill
- Spirit level
- Hammer (if you are using nails)
- Pencil
- Paint or wood preservative

Instructions
1. Cutting the Wooden Slats
Measure the required lengths for the horizontal and vertical slats according to the gate size and the desired Z-bracing. Use a miter saw or a handsaw to cut the slats to the correct lengths. Sand the slats afterward if they are to be painted later.
2. Assembling the Slats
Lay the horizontal slats out on a flat surface and mark the positions for the vertical slats to form the Z-bracing. Attach the vertical slats to the horizontal slats in the Z-pattern using screws or nails. Ensure that the slats are evenly spaced and that the connections are tight and secure.
3. Attaching the Hinges
Attach the hinges to one side of the gate and to the post or wall where the gate will be mounted.
4. Installing Hardware and Locks
Install the lock to secure the gate. Attach all other hardware according to the manufacturer's instructions.
5. Surface Treatment
Finally, you can coat the gate with a wood preservative or paint to protect it from the elements and enhance its appearance.
Tip: The gaps between the slats should be narrow to prevent animals or children from getting through.
Patrick from PF.performance also shows you how to build a garden gate yourself in the following video:

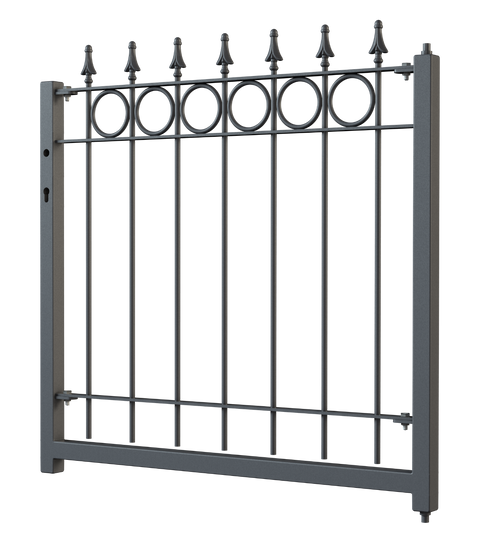
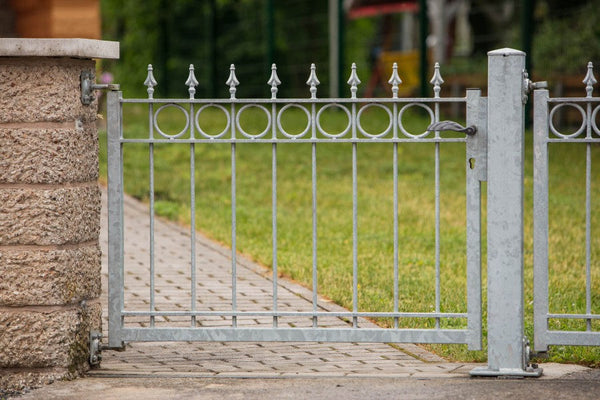
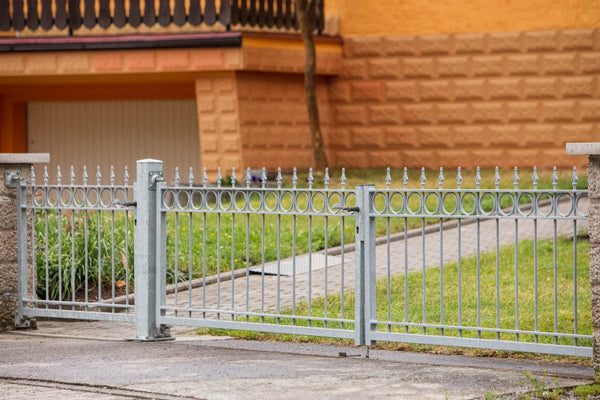
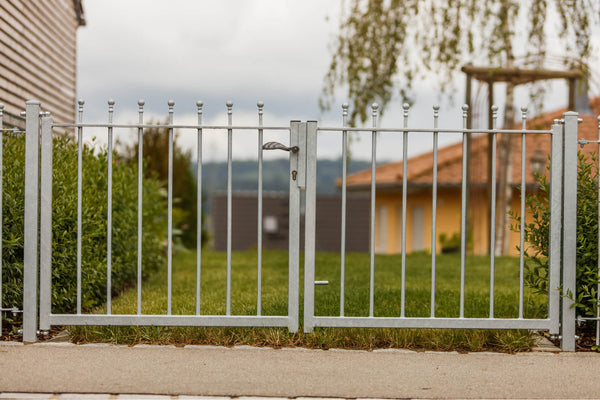
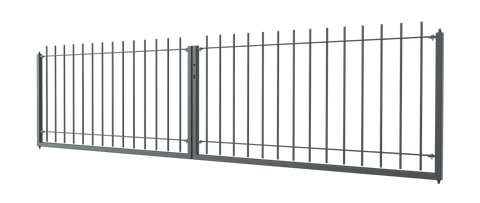
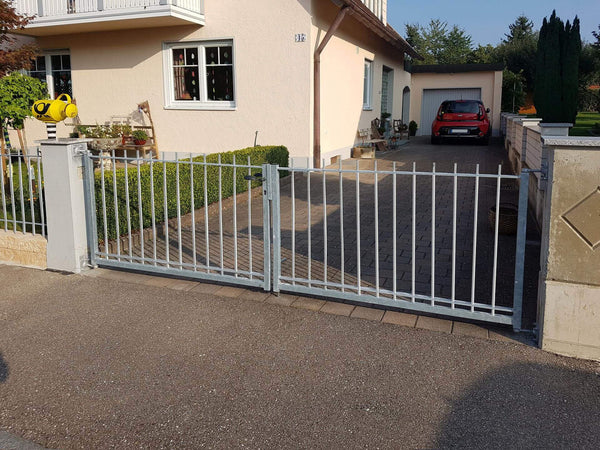
Build your own metal garden gate
The ultimate challenge among DIY projects: building your own metal garden gate. Unlike a wooden garden gate, building one yourself requires experience working with metal and knowledge of tools. If you are relatively inexperienced in working with metal and don't have a welding machine available, building it yourself can quickly become expensive and tedious.
Available in different coatings Available in different coatings Available in different coatings Available in different coatings Available in different coatings Available in different coatings Available in different coatings Available in different coatings Available in different coatings Available in different coatingsFind your garden gate at ELEO Express


Materials and Tools
To build a simple garden gate yourself, consisting of a frame and metal mesh, you will need the following materials:
- Frame and mesh
- Hinges
- Lock or bolt
- Door handles or -knobs
- Paint
Tools you will need:
- Tape rule
- Spirit level
- Work gloves
- Safety glasses
- Metal saw, jigsaw, or angle grinder
- Welding machine
- Welding table
Instructions
1. Cutting the metal parts:
Cut the metal bars and the metal mesh according to the dimensions of your garden gate. Make sure the parts fit precisely and are cut straight.
2. Frame Assembly:
Build the garden gate frame by welding the metal elements together. Caution: Never weld without gloves and safety glasses! Use a spirit level to ensure the frame is straight.
3. Attaching the Metal Mesh:
Attach the metal mesh to the gate frame by welding it on. Alternatively, you can use special metal clamps.
4. Installing the Hinges:
Attach the hinges to one side of the garden gate and to the post or wall where your gate will be mounted.
5. Installing the Lock:
Install the lock box and lock according to the manufacturer's instructions. Check that the gate closes properly.
6. Finishing touches:
Paint or coat your self-built garden gate to protect it from the elements and give it an attractive appearance.
Easy and convenient: Order your garden gate online
Wouldn't you rather sit back and simply order your custom metal garden gate online? Then take a look at our wrought iron gates and learn more about our custom-made gates – simply configure your garden gate from home, instead of sawing and welding.

Tip: A wooden garden gate goes best with a wooden fence, natural stone walls, or a hedge. With wrought iron fences or double-wire mesh panels, the contrast is too great, and the wooden garden gate will look out of place.

Share article